
How to Crochet a Ripple Throw Blanket – Step-by-Step Tutorial
The ripple stitch (also known as the chevron stitch) is trending again in home decor, but crochet lovers know this classic pattern never goes out of style. In this tutorial, you’ll learn how to make a beautiful ripple throw blanket, perfect for your living room, bedroom, or even to sell. Follow the simple instructions below to create your own cozy and colorful piece.

Finished Size
45” x 54½” (approximately 114 cm x 138 cm)
Perfect for couches, beds, or gifting.
Materials Needed
-
2 skeins of each color:
-
Café Latte (360)
-
Blue (886)
-
Soft White (316)
-
Buff (334)
-
-
Crochet hook: 6.5 mm (Susan Bates® K-10.5)
-
Yarn needle
-
Scissors
Tip: Use two strands of yarn held together throughout the project.
Stitches & Abbreviations
-
ch = chain
-
dc = double crochet
-
dc2tog = double crochet two together
-
sc = single crochet
-
sc2tog = single crochet two together
All stitches are worked in back loops only.
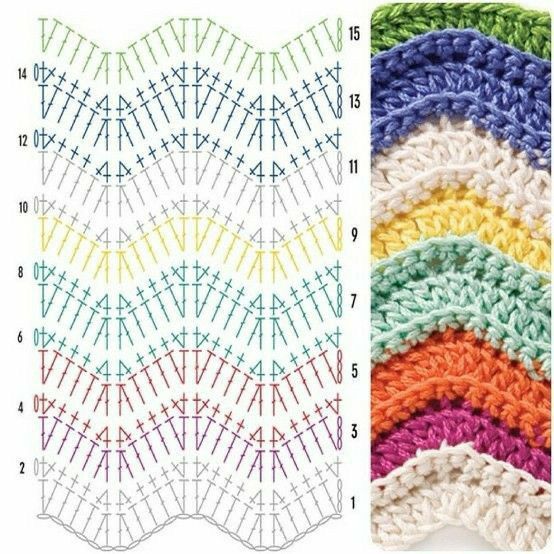
Ripple Stitch Pattern Instructions
Row 1:
-
Chain 159 with Color A.
-
Work the following pattern:
-
dc in the 4th chain from the hook (counts as first dc)
-
dc in next 3 chains
-
[dc2tog] twice
-
dc in next 3 chains
-
2 dc in the next chain
-
*2 dc in the next chain, dc in next 3 chains, [dc2tog] twice, dc in next 3 chains, 2 dc in the next chain; repeat from * across
-
-
Turn your work.
Row 2:
-
Ch 1.
-
2 sc in first dc, sc in next 3 dc
-
[sc2tog] twice
-
sc in next 3 dc
-
2 sc in next dc
-
Repeat the pattern across
-
Turn.
Row 3:
-
Ch 3.
-
dc in same stitch
-
dc in next 3 sc
-
[dc2tog] twice
-
dc in next 3 sc
-
2 dc in next stitch
-
Repeat the pattern across
-
Turn.
➡️ Repeat Rows 2 and 3 until you complete 13 stripe repetitions.
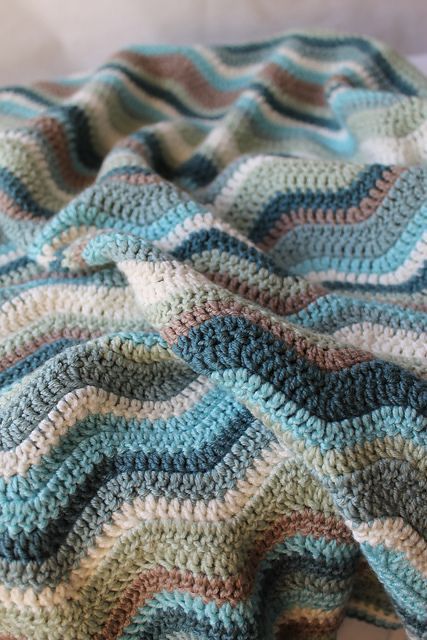
Stripe Color Sequence
Work with two strands held together:
-
2 rows with Color A
-
2 rows with Color B
-
2 rows with Color C
-
2 rows with Color D
-
Repeat this sequence 13 times
-
Finish with 2 additional rows in Color A
Finishing
-
Fasten off and weave in all yarn ends with a yarn needle.
-
For a neater finish, consider blocking your throw.
Extra Tip
Feel free to customize your throw with colors that match your decor! Use soft neutrals for a cozy, elegant look, or bold tones for a fun and modern vibe. This blanket also makes a great handmade gift or item to sell—it’s always in demand!